We may earn a commission from links on this page, at no extra cost to you.
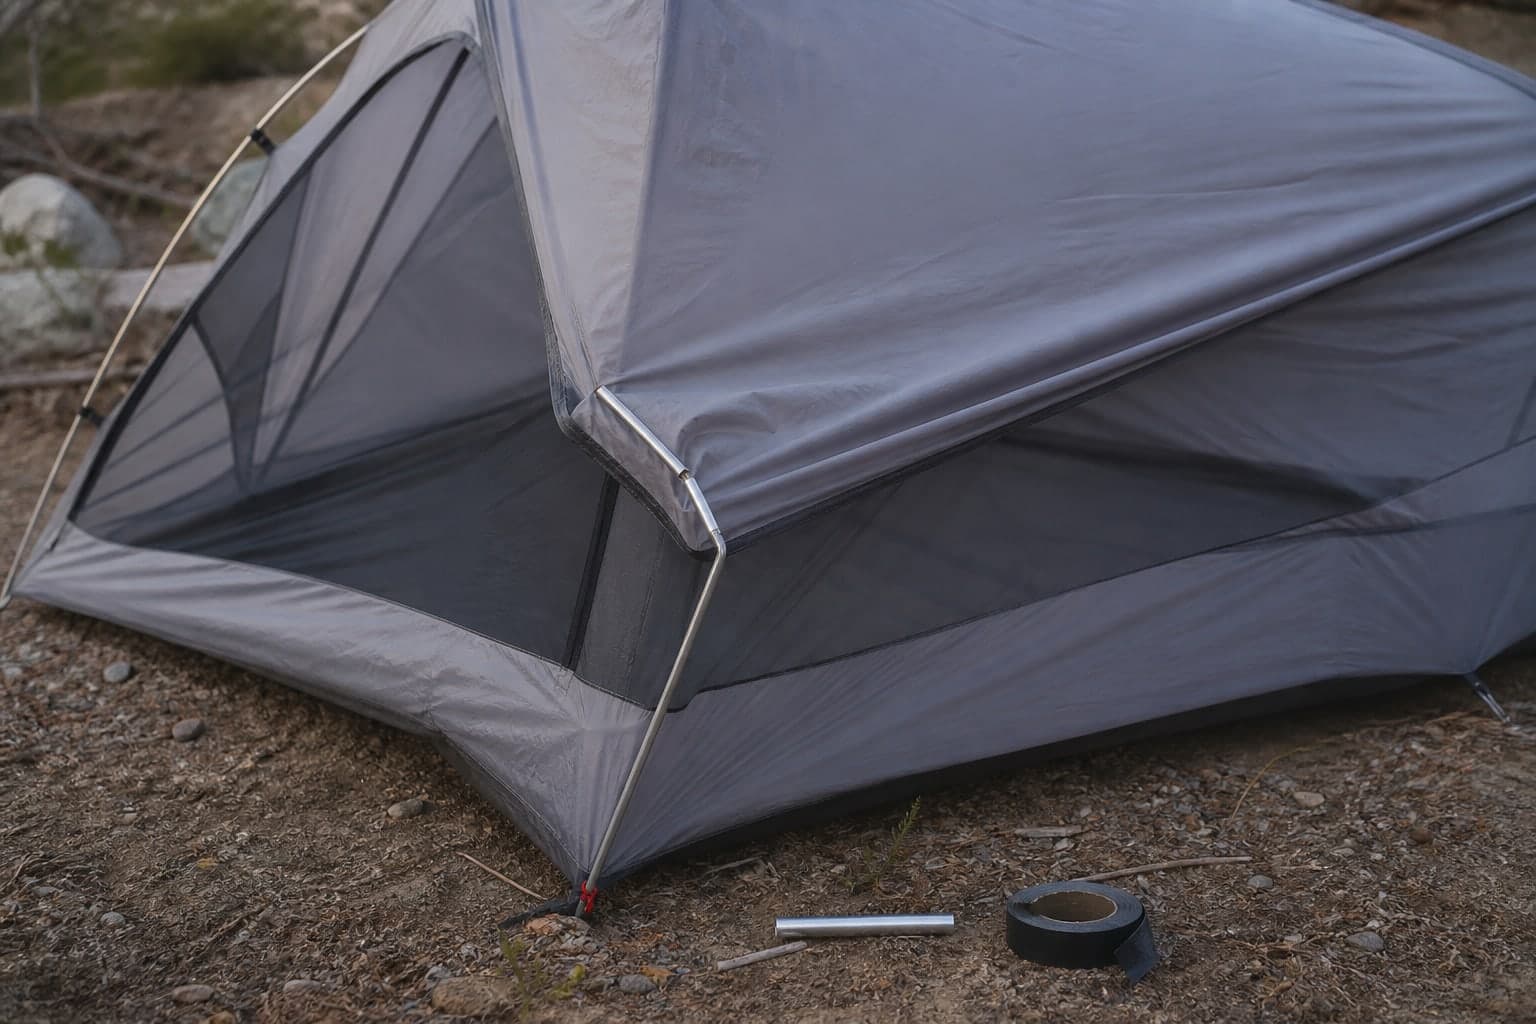
A split or kinked tent pole can often be stabilized long enough to finish a trip, but the field repair is a splint, not a restoration. Remove tension from the pole, protect your hands from sharp fibers or metal, align the damaged section, and bridge it with a proper repair sleeve.
First, identify what failed
Do not start wrapping tape until you know which part is damaged.
- A section is kinked, cracked, or split: it needs a rigid sleeve or splint that extends beyond both sides of the damage.
- A joint has separated: unload the pole and check whether the narrow ferrule is bent, blocked, or no longer seated in the next section.
- The internal shock cord snapped: the pole sections are usually still structurally usable when fitted together, but they will no longer stay organized as one assembly.
- A fiberglass pole is splintering: wear gloves, avoid rubbing the fibers, and cover the area before handling it further.
If the pole is under heavy wind load, move people and loose gear away before releasing it. A suddenly unloaded pole can spring out of place.
Repair a split or kink with a sleeve
A stable field repair
Unload the pole
Detach the nearby clips or fabric and gently remove the pole from tension.
Align the section
Bring the pole back into a straight line without repeatedly bending the damaged metal or fibers.
Center the sleeve
Slide a repair tube that is slightly wider than the pole over the break, with solid pole extending beneath both ends.
Secure both ends
Use short tape wraps at the sleeve ends to stop it drifting while the pole flexes.
Re-pitch gently
Reassemble the shelter, reduce unnecessary tension, and watch the repair as the weather changes.
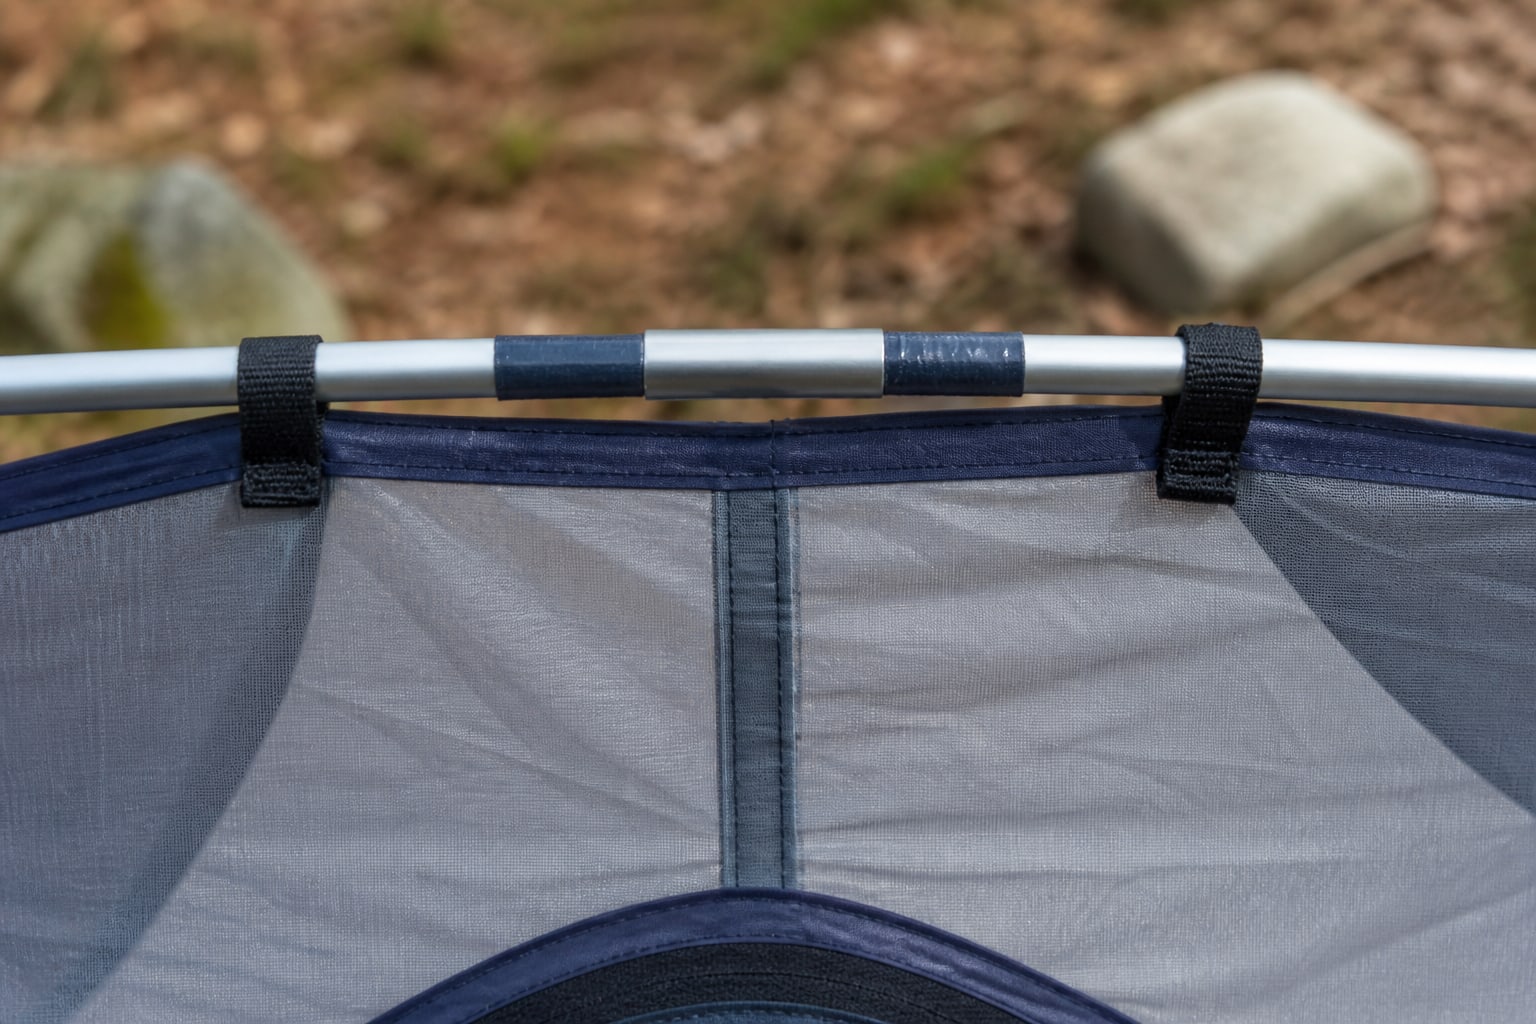
Field fix: the sleeve bridges the damaged section and the tape keeps it centered. It does not make the pole permanently sound.
The sleeve should be only slightly larger than the pole. If it is so loose that the pole can buckle inside it, it is not supporting the break well. If a sharp edge prevents the sleeve from sliding into place, do not force your bare hand across it.
No sleeve? Use a smooth stake as a splint
A straight tent stake can work outside the pole when no sleeve is available. Align the damaged area, place the smoothest side of the stake against it, and tape the stake above and below the break. Keep sharp corners and stake tips away from the tent fabric.
This repair is bulkier than a sleeve and can interfere with pole clips or sleeves. Reposition clips only if the tent design allows it without creating a new stress point. Do not use a stick with rough bark or a jagged edge where it can puncture the fly.
Tape alone is rarely enough for a pole that has lost its shape. Tape contains fragments; the rigid splint carries the bending load.
If the shock cord broke
Shock cord helps the sections find one another, but it is not what gives an assembled pole its main strength. Collect every segment, insert each ferrule fully into the next section, and feed the assembled pole through the tent carefully. Keep the sections together when you take the shelter down.
Replacing the cord is better done at home, where you can measure the pole, keep sections in order, and tie the new elastic correctly. A loose joint can split when the tent bends, so check every connection before applying tension.
Decide whether the tent is still safe
Stay conservative in exposed weather. Lower the wind profile, point the strongest end of the shelter into the wind, use every appropriate guyline, and inspect the repair after gusts. Our guide to stopping a tent from flapping in the wind explains how to reduce avoidable loads.
Leave or switch shelters if the repair keeps slipping, a second section is damaged, the tent cannot hold its shape, or the forecast is getting worse. A field fix that works in calm weather may fail abruptly in a storm.
Prepare before the next trip
Ask the tent maker for a replacement section using the model name, pole position, diameter, and length. Preserve the broken section until the replacement arrives; it contains the measurements and ferrule style you need.
If repeated pole failures or an awkward setup are making trips harder, compare our best camping tents for beginners. A repair sleeve, compatible pole section, spare shock cord, tape, and gloves belong in the shelter kit even with a new tent.
Can duct tape fix a broken tent pole by itself?
Tape can secure a sleeve or contain splinters, but it usually cannot replace the rigidity lost when a pole kinks or splits. Add a proper sleeve or a smooth rigid splint.
Can I keep using a tent pole after a sleeve repair?
Use the repair cautiously for the remainder of the trip if it stays aligned and conditions are safe. Replace the damaged section before relying on it for another trip.
Does a broken shock cord mean the pole is unusable?
Usually not. Fully seated pole sections can still support the tent, but they must be assembled and handled carefully until the elastic cord is replaced.
Keep going
Related buying guideBest camping tents for beginners in 2026: 7 easy-pitch picksRelated guides
 Complete camp loadoutCamp sleep systemBuild the complete kit
Researched, not hands-on tested
Updated Aug 19, 2026Our recommendations draw on manufacturer documentation, retailer listings, owner feedback, and comparisons with alternatives.
As an Amazon Associate I earn from qualifying purchases. We may earn a commission from links here, at no extra cost to you. How we research →
Related buying guide
Best camping tents for beginners in 2026: 7 easy-pitch picks