
We may earn a commission from links on this page, at no extra cost to you.
A power tower puts four serious upper-body and core exercises in a single frame, but the machine is only as good as your technique on each station.
The four stations and what they actually train
Understanding each station's role prevents you from treating a power tower as a random rep generator.
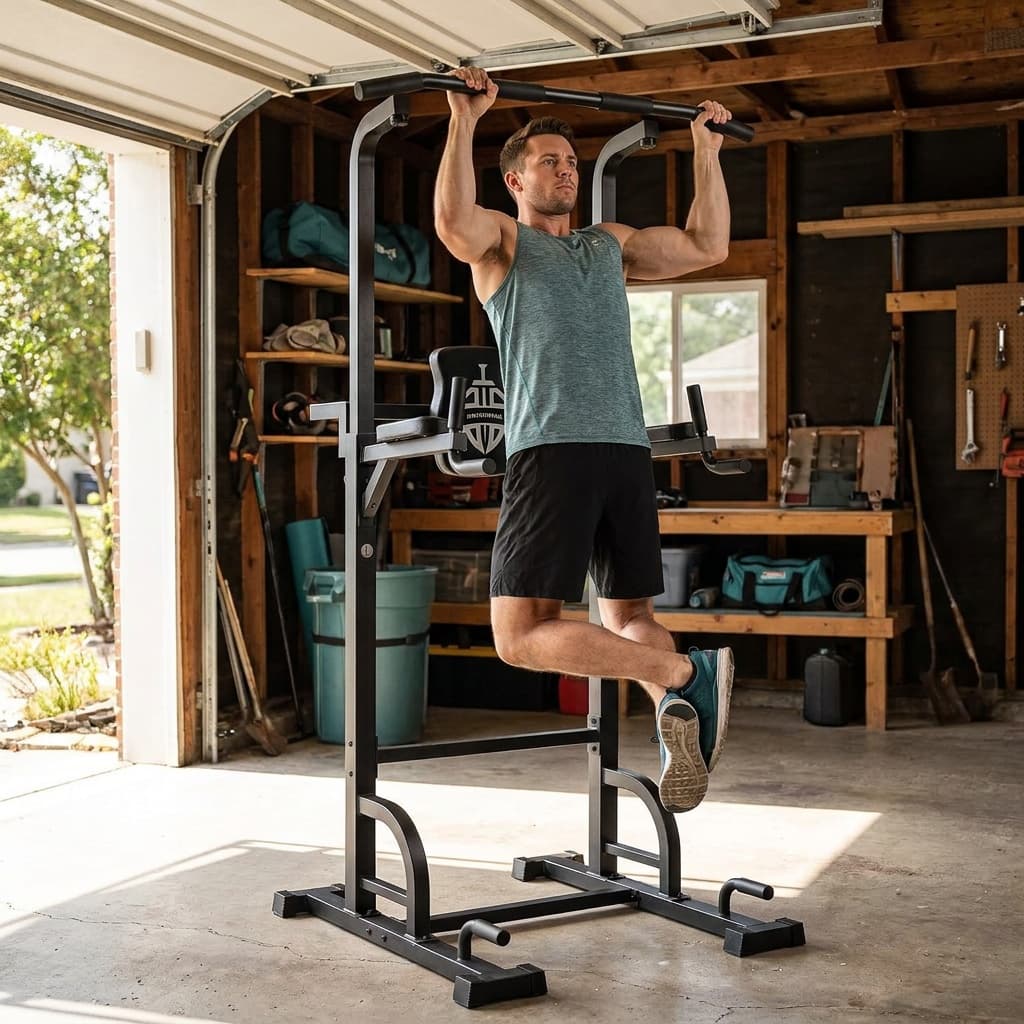
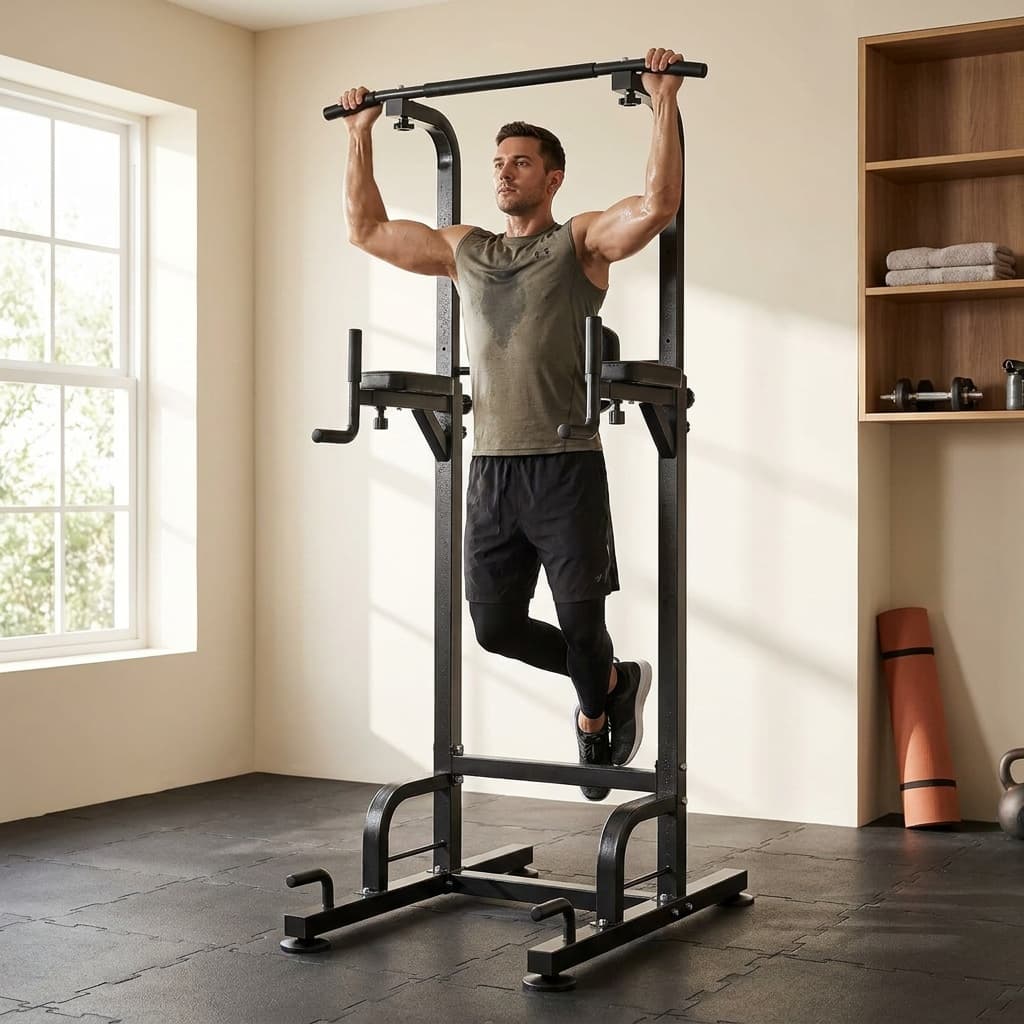
Pull-up bar. The top horizontal bar trains your latissimus dorsi, biceps, and rear deltoids. Overhand grip (pronated) emphasizes the lats; underhand grip (supinated, technically a chin-up) recruits the biceps more heavily. Both are worth keeping in your rotation.
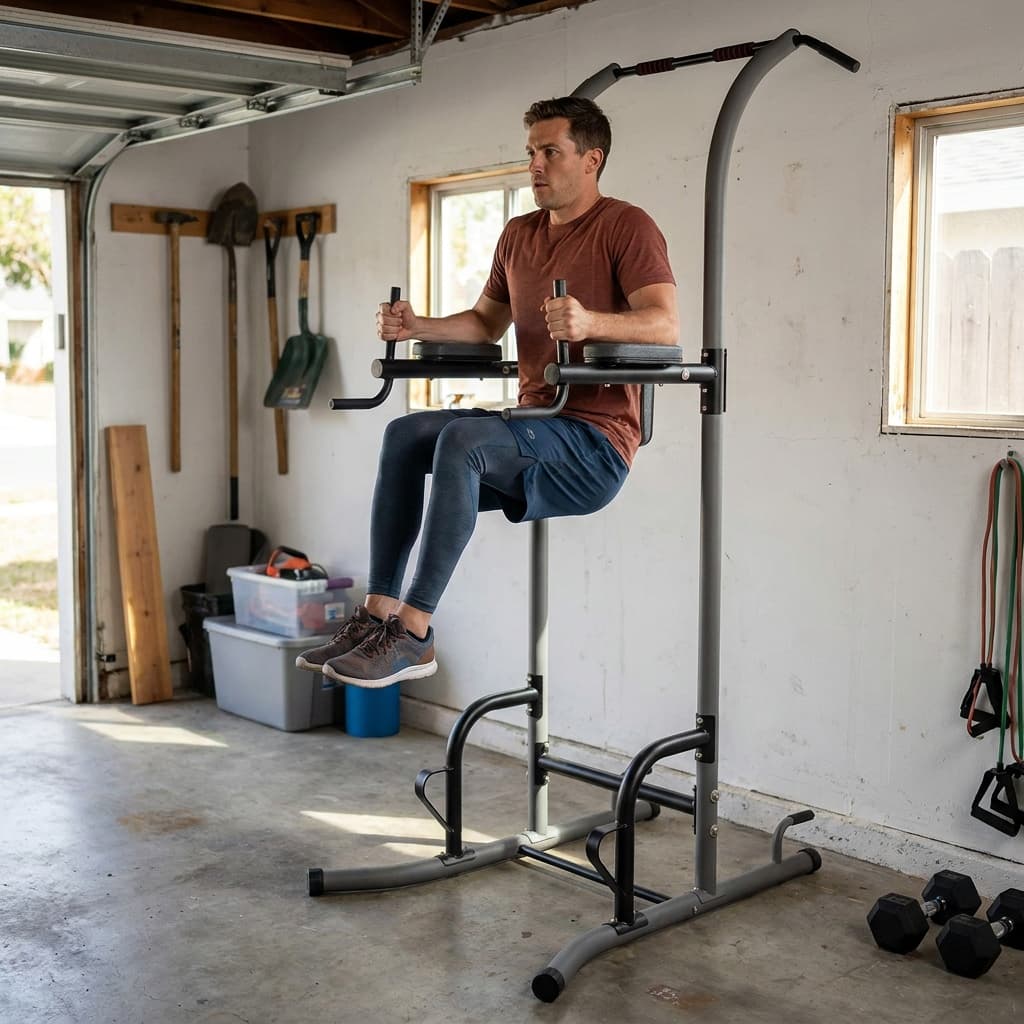
Dip bars. The parallel handles at mid-frame train your pectorals, anterior deltoids, and triceps. Leaning your torso slightly forward shifts emphasis toward the chest; staying upright shifts it toward the triceps. Most people benefit from the slightly forward version early on.
Vertical knee raise (VKR) pads. The padded arm rests and back pad let you hang and lift your legs against gravity. A bent-knee raise (knees to chest) is the entry point; a straight-leg raise (toes to bar) is advanced. Both train the hip flexors and rectus abdominis. The back pad removes the grip-endurance variable so you can focus on the core.
Push-up grips (floor handles). The handles at the base let you drop into push-ups with a neutral wrist angle and slightly deeper range of motion than floor push-ups. They train the same muscles as dips but from a horizontal pressing pattern.
Proper form, station by station
Key form cues for each station
Pull-up
Start from a dead hang. Depress and retract your shoulder blades before pulling. Drive elbows toward your hips, chin clears the bar. Lower with control over 2–3 seconds.
Dip
Grip the bars, lock your elbows out at the top (but do not hyperextend). Hinge slightly forward, lower until upper arms are parallel to the floor (roughly 90 degrees at the elbow), then press back up. Avoid shrugging your traps.
Vertical knee raise
Press your lower back firmly into the pad. Tilt your pelvis posteriorly (tuck slightly) before lifting. Raise knees to at least hip height; pause at the top; lower with control. Do not swing.
Push-up grip
Hands directly under shoulders on the handles. Keep a rigid plank from heels to crown. Lower chest to handle height, not just to the floor. Elbows track at roughly 45 degrees from your torso.
Assisted progressions with bands
A looped resistance band makes every station accessible and also accelerates skill development because it keeps you in the full range of motion rather than cutting the rep short.
For pull-ups and chin-ups: loop the band over the bar and place one or both knees inside. The band gives the most help at the bottom of the rep (where you are weakest) and reduces assistance at the top (where you are stronger). A light band (typically 10–35 lb assist) lets near-beginners do full pull-ups immediately.
For dips: loop the band between the parallel bars and sit the middle of your thighs in it. Same principle: most assistance at the bottom.
For VKR: no band needed. Regress by bending the knees deeply; progress by straightening them gradually over weeks.
A resistance band is not a crutch; it is a teacher that keeps you honest about your range of motion while your strength catches up.
Progress off the band by using a thinner band (less assistance) every 2–3 weeks once you can complete sets cleanly, rather than jumping to unassisted immediately.
Safety and stability checks before every session
Power towers are bolted or weighted to stay stationary, but a handful of checks take 60 seconds and matter.
- Rock test: place both hands on the frame and push side to side and front to back. Any wobble means a foot pad is off the floor or a bolt has loosened. Tighten or re-level before loading.
- Weight limit: most consumer towers are rated for 250–300 lb, though sturdier frames like the Sportsroyals Power Tower carry higher ratings. Add your bodyweight plus any added load (weighted vest) and stay below the rated limit with a margin.
- Pad condition: cracked VKR foam compresses unevenly and shifts your back off the support pad. Replace pads before they fail completely.
- Floor surface: carpet can let the tower walk forward under dip loading. Use rubber anti-slip pads under each foot, especially on smooth concrete.
A beginner-to-advanced weekly structure
Three sessions per week with at least one rest day between them is the reliable pattern. Alternate a pulling focus with a pushing/core focus.
Beginner (weeks 1–6): band-assisted pull-ups 3 x 5, push-up grips 3 x 8, VKR bent-knee raises 3 x 10. Rest 90 seconds between sets.
Intermediate (weeks 7–16): unassisted pull-ups or chin-ups 3 x 5–8, dips 3 x 8–10, VKR straight-leg raises 3 x 10–12. Add one weighted-vest session per week (a simple plate-loaded vest like the APEXUP Weighted Vest works well here) once you hit 10 clean pull-ups.
Advanced (ongoing): weighted pull-ups (vest or belt) 4 x 4–6, weighted dips 4 x 6–8, VKR toes-to-bar 3 x 10, L-sit holds between sets. Rotate grip width and tempo for continued adaptation.
Track your reps each session. When a set feels easy at the top of its rep range for two consecutive sessions, either add a rep, slow the eccentric phase, or progress the variation.
Frequently asked questions
How often should I use a power tower as a beginner?
Three times per week with at least one full rest day between sessions is the standard starting point. Your muscles adapt during recovery, not during the session itself. Two sessions per week will still produce progress; four or more with no rest days will stall you faster than you expect.
Can a power tower replace a full gym for upper-body training?
For pull, push, and core patterns, yes. A power tower covers horizontal and vertical push, vertical pull, and anterior core work. The gap is horizontal pulling (rows). You can close most of that gap by adding a set of gymnastic rings or a TRX suspension trainer to the power tower frame and performing inverted rows.
Why do my shoulders hurt during dips?
Dip-related shoulder pain typically comes from one of two causes: descending too far past 90 degrees at the elbow before your shoulder mobility is ready, or flaring the elbows too wide. Start with a shallower range (upper arm only slightly below parallel) and keep your elbows tracking no wider than your wrists. If pain persists past two or three sessions after correcting form, stop dips and consult a sports medicine provider.
For specific picks, see our guide to the best power towers. Browse all fitness guides or read how we research and rate gear.
Recommended gear
Our current top picks from the Best power towers for home bodyweight training (2026) guide, if you are ready to buy.
SPORTSROYALS
Sportsroyals Power Tower Pull Up Bar Station, 450LBS
- Weight capacity
- 450 lb
- Height range
- 64.6" – 88.2" (6 positions)
- Base footprint
- 43" L x 27" W
- Frame
- 14-gauge steel, H-base with 8 support points
- Padding
- 3" foam armrests, 7-position adjustable backrest
- Exercise stations
- Pull-up, dip, knee raise, push-up
The Sportsroyals is the top-selling freestanding power tower on Amazon, with a 450 lb rated frame and an elongated H-base that distributes load across eight contact points. Multi-grip pull-up bar, padded dip handles, and a captain's chair cover the full bodyweight toolkit in a compact footprint.
- H-base eliminates lateral sway during strict pull-ups and dips, confirmed by owners training with added weight on a dip belt
- Six height settings and a 7-position adjustable backrest fit athletes from roughly 4'8" to 6'6"
- Slight lateral movement appears during kipping or explosive movements, so it is better suited to controlled reps
RELIFE
RELIFE REBUILD YOUR LIFE Power Tower Pull Up Bar Dip Station
- Weight capacity
- 450 lb
- Height range
- 56" – 86" (9 positions)
- Base footprint
- 42.9" L x 35.4" W
- Frame
- 14-gauge steel, powder-coat finish
- Stability features
- Safety locknuts, 4 suction cup feet
- Exercise stations
- Pull-up, dip, knee raise, push-up
The RELIFE tower offers the widest height adjustment range in its class (9 positions, from 56 to 86 inches) and a 450 lb rating, for roughly $20 to $30 less than most direct competitors. Suction cup feet and safety locknuts add reassurance for solo training.
- Nine height positions cover the widest range in this price bracket, fitting users from 5'3" up to about 6'2"
- Safety locknuts at each adjustment joint keep the tower quiet and prevent height creep during sets
- Owners above 180 lb report front-to-back sway of roughly 0.5 inches during dynamic movements; wall placement is recommended above 200 lb
BODY CHAMP
Body Champ VKR1010 Multi-Function Power Tower
- Weight capacity
- 250 lb
- Assembled height
- 83"
- Base footprint
- 55" L x 36" W
- Frame
- Steel D-frame with dual arched stability bars
- Padding
- Seam-stitched contoured arm and back pads
- Exercise stations
- Pull-up, dip, vertical knee raise, push-up
The Body Champ VKR1010 is one of the longest-tenured power towers on Amazon, with a wide arched base that provides good lateral footprint at an entry-level price. It covers the four standard stations and ships with seam-stitched padding that owners consistently note as more comfortable than the bare-foam alternatives at this price.
- Wide arched base (55" long, 36" wide) provides stable footing for users under the 250 lb limit during controlled movements
- Contoured seam-stitched arm and back pads are a comfort step above most budget competitors
- 250 lb weight limit is the lowest in this roundup; heavier users or anyone adding a weighted vest should step up
See all picks in Best power towers for home bodyweight training (2026)
Related guides
Buying guide
Best power towers for home bodyweight training (2026)
The four best power towers for pull-ups, dips, and knee raises at home, ranked by stability, weight capacity, and value. Picks for every budget.
Read guide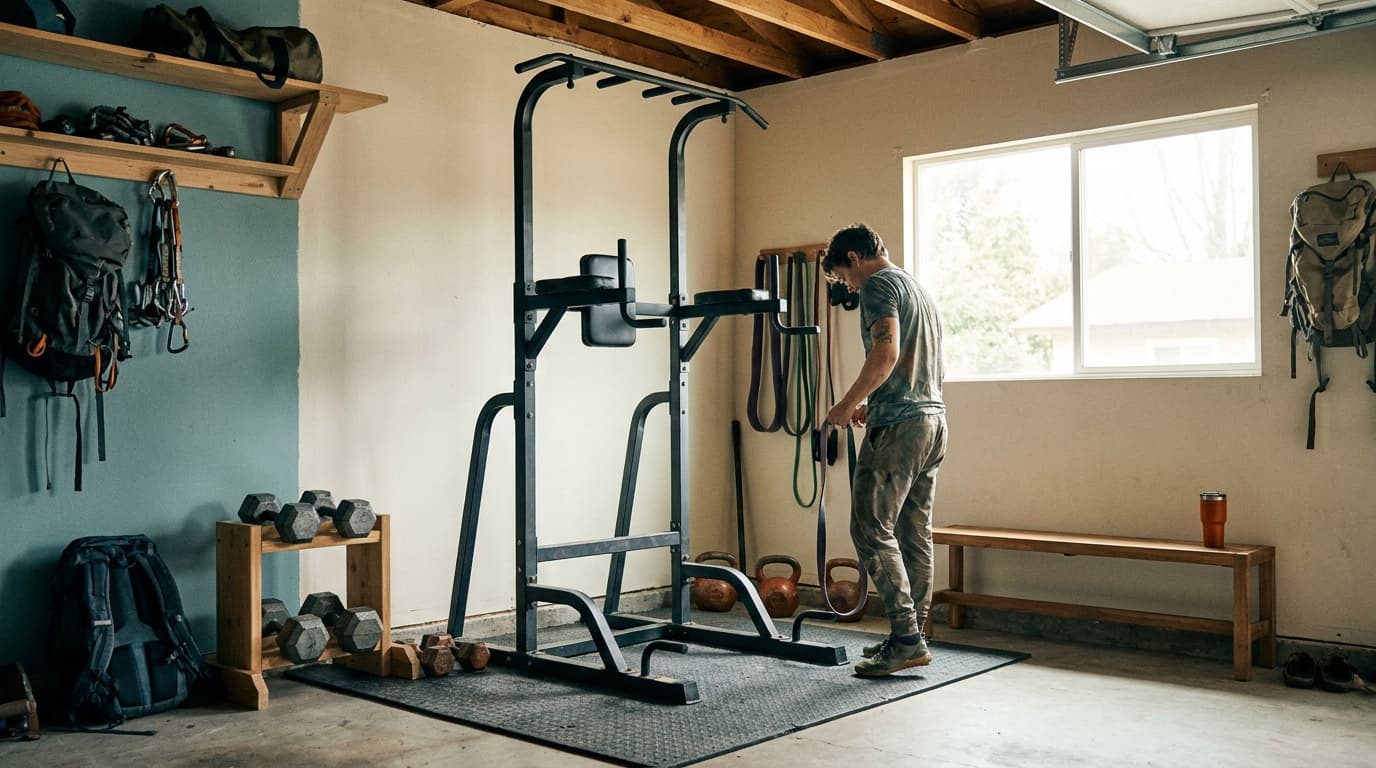
Field guide
Are power towers worth it
Power towers combine a pull-up bar, dip station, and ab station in one footprint. Here is who benefits, what the trade-offs are, and how they compare to cheaper alternatives.
Read guide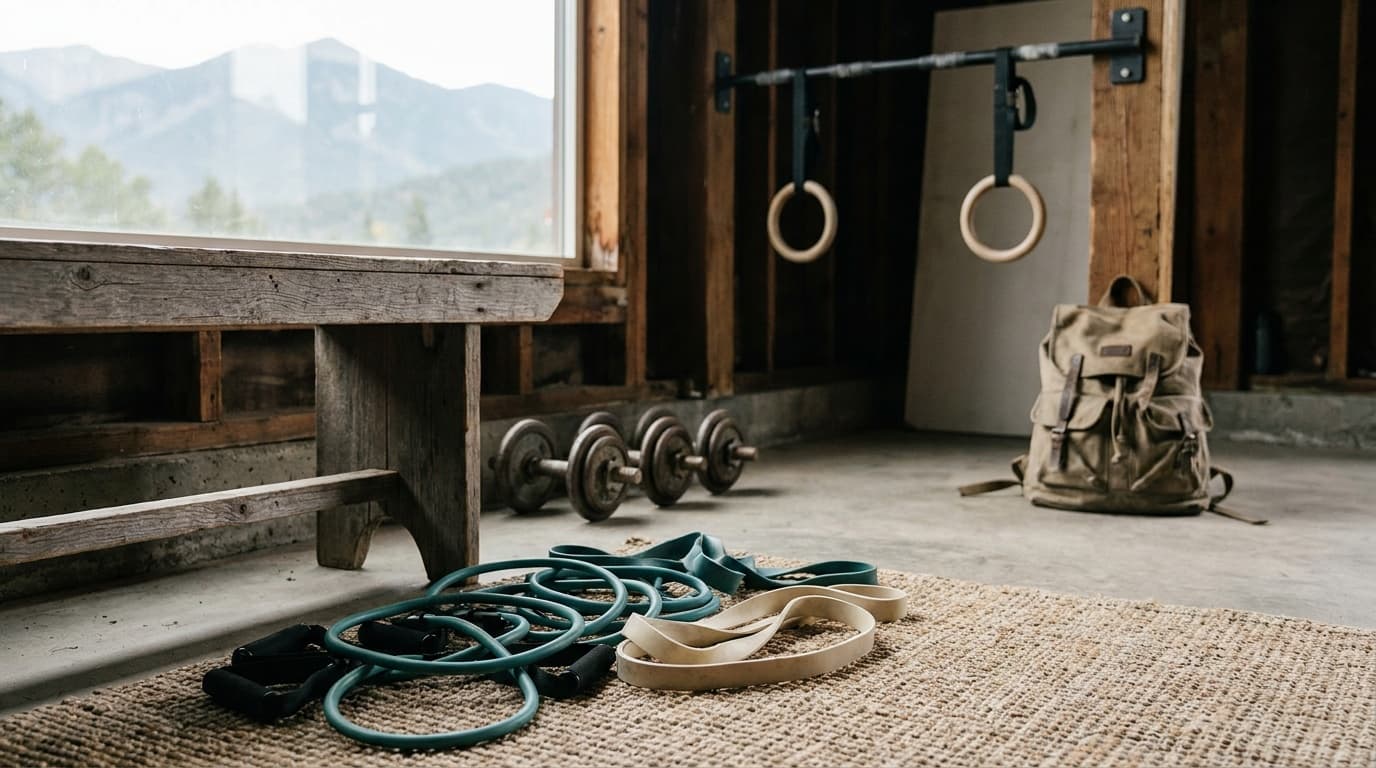
Comparison
Resistance tubes vs resistance bands: which should you buy?
Handles and anchors for gym-style moves, or flat loops for mobility and glutes? Here is how to pick the right resistance tool for your training.
Read guide
Comparison
Parallettes vs push-up bars: the skill ceiling decides it
Push-up bars stop at push-ups; parallettes add L-sits, handstands, and dips. Height, stability, price, and space compared so you buy the right pair once.
Read guideResearched, not personally tested: picks come from specs, verified-owner reviews, and expert sources, scored into the Kit Score. As an Amazon Associate I earn from qualifying purchases. We may earn a commission from links here, at no extra cost to you. How we research →