We may earn a commission from links on this page, at no extra cost to you.
Rowing is one of the few cardio machines that loads your legs, back, and arms in a single stroke, but only if your sequence is right. Get the order wrong and you leave power on the table and put unnecessary strain on your lower back.
The four phases of a rowing stroke
Every stroke breaks into four positions. Learning the names makes coaching cues easier to follow.
The stroke cycle
The catch
Shins vertical, arms straight, hinge forward from the hips with a tall spine. This is the compressed start position.
The drive
Push through the footplate with both legs. Keep the arms straight until the legs are almost flat, then swing the torso back to about 11 o'clock.
The finish
Legs flat, torso leaned back slightly, elbows drawn past the sides with the handle at the lower chest. This is peak power.
The recovery
Arms extend first, then the torso rocks forward, then the knees bend to slide back to the catch. Mirror the drive in reverse.
The recovery should take roughly twice as long as the drive. A rushed slide back to the catch is one of the fastest ways to tire yourself out and lose control of the stroke.
Why legs-back-arms order matters
Your legs are your largest, strongest muscle group. The whole point of the drive sequence is to load that power first, then transfer it through a stable torso, and finally finish with the arms. When you break sequence and pull with the arms early, you are asking your biceps to do a job your glutes and quads should be handling.
Every watt of power you generate on a rowing machine originates at the footplate, not the handle.
A simple drill to lock this in: row with arms straight for a full minute, driving only with your legs and using the back swing. When you finally add the arm pull back in, the sequence feels obvious.
Common mistakes and how to fix them
Early arm pull. The handle moves before the legs reach full extension. Fix: think "legs, then lean, then arms" as a verbal cue on every stroke for your first few sessions.
Rounding the lower back. Usually caused by sitting into the catch without hinging at the hips. The lower back should maintain a neutral curve, not collapse forward. Engage your core before each drive.
Shooting the hips. The seat rises before the handle does. This means your back is doing the work instead of your legs. Drive the handle and the seat at the same rate at the start of each stroke.
Rushing the slide. Sliding aggressively back to the catch spikes your heart rate without generating power. Control the recovery and you will actually row faster over longer pieces.
Gripping too hard. A tight grip burns out the forearms and creates tension up through the shoulders. Hold the handle loosely; your fingers hook it, your palm does not crush it.
Damper setting and stroke rate
The damper on a Concept2 RowErg (the lever on the side of the flywheel housing) controls airflow into the flywheel, not resistance the way a bike tension knob does. A higher damper setting means the flywheel spins more heavily, which makes each stroke feel slower and choppier. It does not mean you are working harder in any meaningful cardiovascular sense.
Stroke rate (strokes per minute, or SPM) is a separate control from damper. Beginners often try to row fast by increasing SPM, which sacrifices power per stroke and makes the technique sloppy. Instead, keep SPM in the 20–24 range and focus on connecting hard with each drive. As your technique improves, you can push into the 26–28 range for steady-state work.
A beginner workout to build from
The goal for your first few weeks is to ingrain the sequence, not to exhaust yourself. Fatigue makes form fall apart, which reinforces the wrong patterns.
Week 1–2: 3 sessions per week. Each session: 3–4 rounds of 4 minutes rowing at 20–22 SPM with 2 minutes rest. Focus entirely on the catch position and the leg drive order.
Week 3–4: Add one longer piece. Try a 10-minute continuous row at 22–24 SPM. Watch your split time (shown as time per 500 meters on most monitors) and aim to keep it consistent rather than negative-splitting aggressively.
Common benchmark: A 2000-meter time trial is the standard rowing test. Most beginners land between 8:00 and 10:00 for the 2000m. Do not attempt a flat-out 2000m until you have 3–4 weeks of consistent technique work behind you.
For recovery, rowing at 18–20 SPM with low intensity is genuinely low-impact. The chain of muscles used in a correct stroke (glutes, hamstrings, lats, core) responds well to volume once the technique is solid.
Frequently asked questions
How long should a beginner row each session?
Twenty to thirty minutes total, including rest intervals, is a reasonable starting point. The constraint early on is technique degradation, not cardiovascular capacity. Short, focused intervals with rest let you practice the sequence with good form rather than grinding through bad reps.
Is a higher damper setting better for a workout?
No. A higher damper setting simulates rowing a heavier boat and can actually reduce your power output per stroke if you are not conditioned for it. Most experienced rowers use a damper in the 4–6 range. Set it where your stroke feels connected and controlled, not sluggish.
What should I do if my lower back hurts after rowing?
Lower back pain after rowing almost always points to a form issue, most often rounding at the catch, shooting the hips, or over-reaching past vertical shins at the catch. Reduce intensity, shorten your session, and drill the hip-hinge position before adding load back in. Persistent or sharp pain warrants a check with a physiotherapist before continuing.
For specific picks, see our guide to the best rowing machines. Browse all fitness guides or read how we research and rate gear.
Recommended gear
Our current top picks from the Best Rowing Machines for Home Cardio (2026) guide, if you are ready to buy.
CONCEPT2
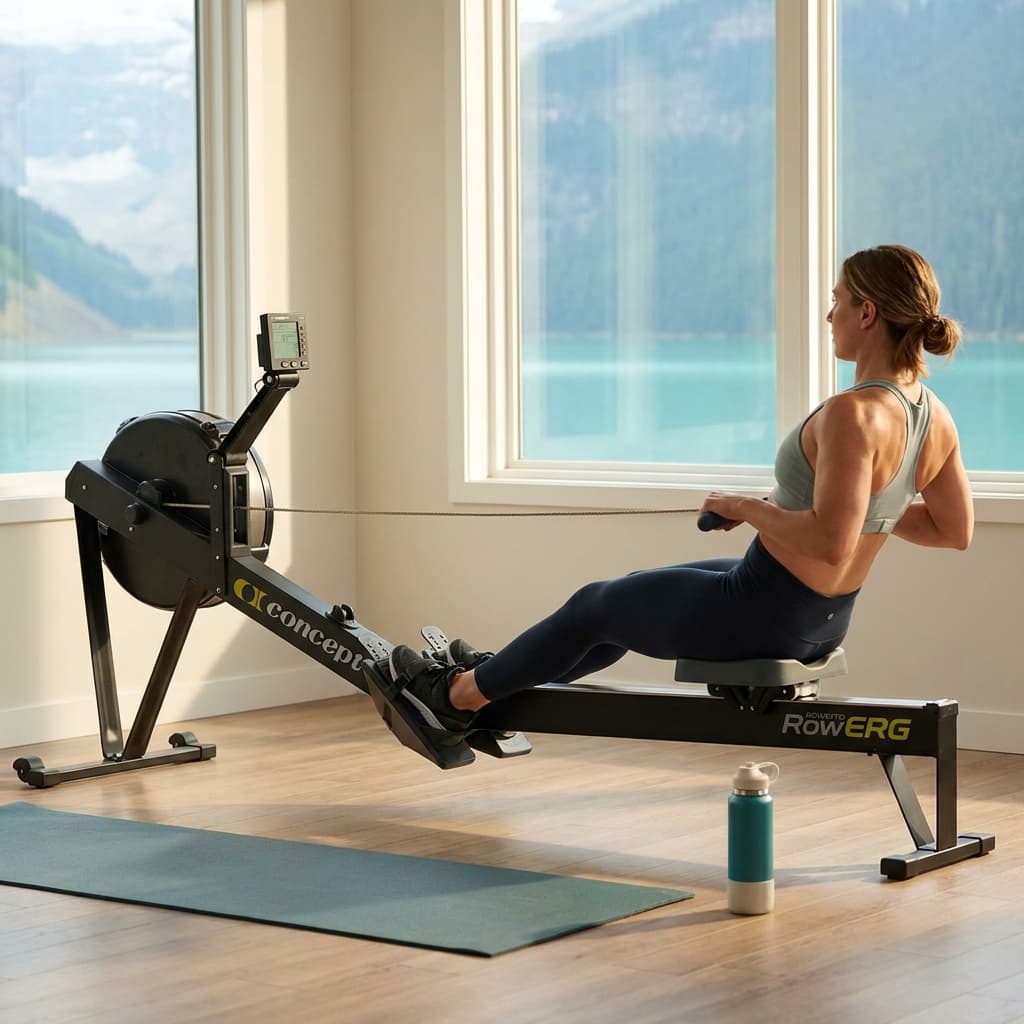
Concept2 RowErg Indoor Rowing Machine
- Resistance type
- Air (adjustable damper, settings 1–10)
- Max user weight
- 500 lb (227 kg)
- Dimensions (in use)
- 96" L x 24" W x 28" H
- Monitor
- PM5 LCD with Bluetooth and ANT+
- Foldable
- Separates into two pieces for storage
- Frame warranty
- 5 years (2 years on moving parts and monitor)
The Concept2 RowErg is the benchmark for indoor rowing, used by Olympic teams and CrossFit facilities worldwide. Air resistance self-adjusts to effort level, so the harder you pull, the more resistance you feel, with no resistance cap for elite athletes.
- Exceptional 500 lb weight capacity and commercial-grade durability at a sub-$1,000 price
- PM5 monitor tracks pace, watts, calories, and heart rate; connects via Bluetooth to apps like ErgData and the Concept2 Logbook
- Hard plastic seat becomes uncomfortable for sessions over 30 minutes without a seat pad
MERACH
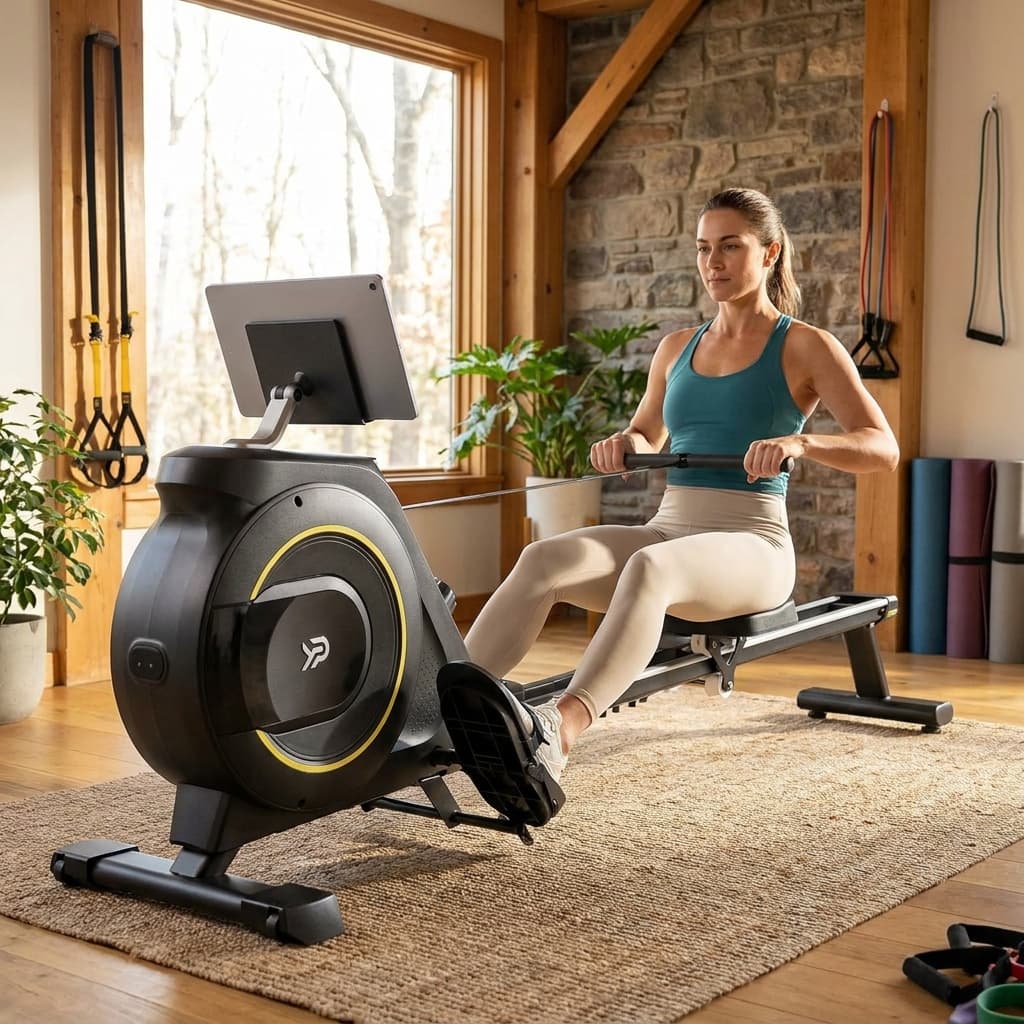
MERACH Q1S Magnetic Rowing Machine
- Resistance type
- Magnetic, 16 levels
- Rail system
- Dual slide rail (aluminum alloy)
- Max user weight
- 350 lb
- Machine weight
- 58.9 lb
- In-use footprint
- 65 x 19.3 x 24.8 in
- Storage footprint
- 19.3 x 24.8 in (folds upright)
The MERACH Q1S holds the number-one spot on Amazon's rowing machine best sellers list with a confirmed in-stock listing at under $200. Its dual slide rail, modeled after wood-rower geometry, adds lateral stability that single-rail budget rowers lack, and 16 magnetic resistance levels give beginners to intermediate rowers genuine room to progress. The LCD monitor tracks time, strokes, calories, and distance, while Bluetooth pairing with the MERACH or Kinomap app opens structured workouts without a subscription requirement. Assembly is partial out of the box and takes most users under 30 minutes. At 58.9 lb and with integrated base wheels, it is manageable to reposition, and the upright fold-and-store profile reclaims most of its floor space between sessions.
- Confirmed in-stock at $189.99 with 2,174 verified Amazon ratings and a 4.4-star average, placing it at number one in the category
- Dual slide rail design reduces seat wobble and lateral tip risk compared to single-rail competitors at the same price
- At 58.9 lb it is heavier than ultra-compact budget rowers, so the built-in wheels are useful but moving it up stairs is a two-person job
WATERROWER
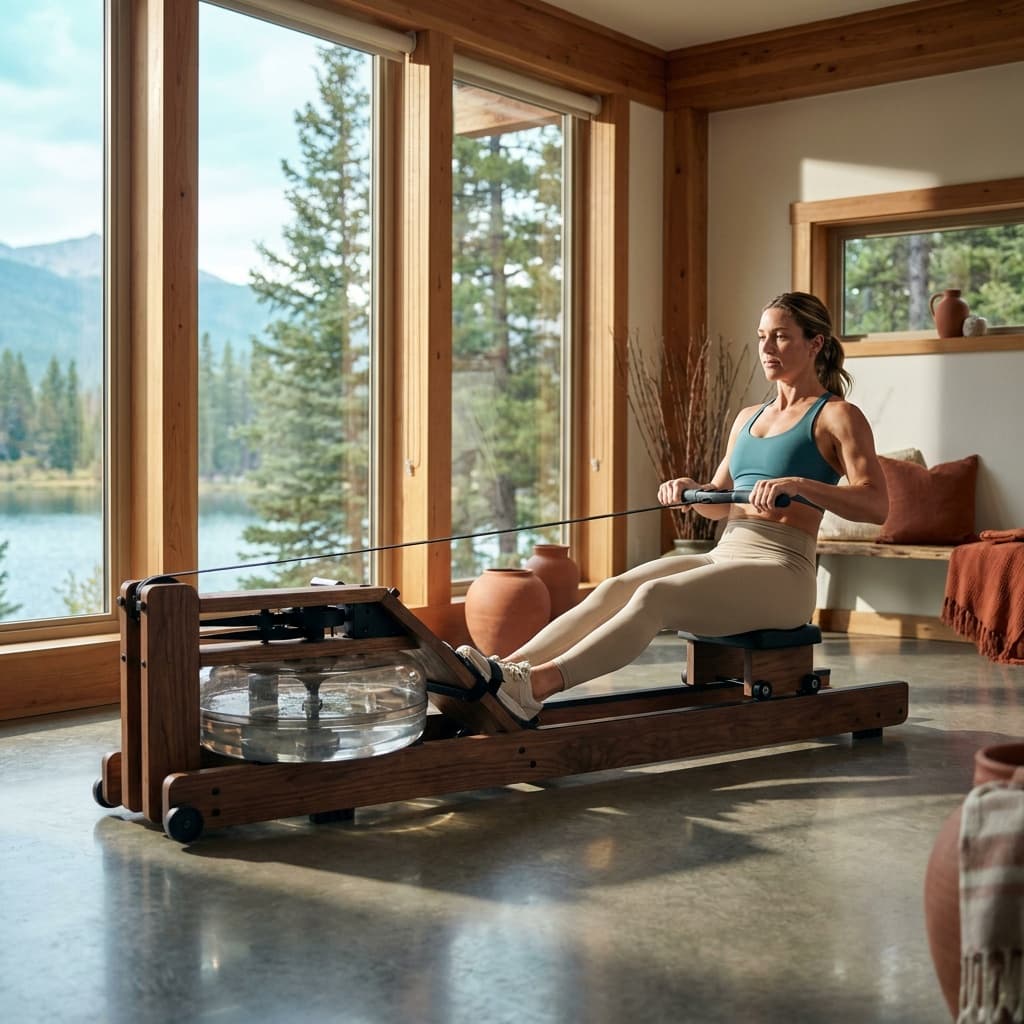
WaterRower Walnut Rowing Machine with S4 BLE Monitor
- Resistance type
- Water flywheel (resistance scales with rowing speed)
- Max user weight
- 700 lb (318 kg)
- Dimensions (in use)
- 82" L x 22" W x 20" H
- Monitor
- S4 BLE (Bluetooth, tracks pace, watts, calories, distance)
- Storage
- Tilts upright to 3.06 sq ft footprint
- Construction
- Hand-built American Black Walnut, made in Rhode Island
The WaterRower Walnut is a handcrafted solid-wood rower built in Rhode Island, with a water-filled flywheel that produces resistance scaling naturally with your effort. The result is one of the smoothest, quietest strokes available in home rowing, along with a machine that doubles as living-room furniture.
- Water resistance creates a stroke that closely mirrors on-water rowing: smooth, self-regulating, and quiet with a calming water sound rather than mechanical noise
- Highest weight capacity in its class at 700 lb, with zero reported frame flex even under hard rowing
- S4 monitor is functional but basic: no built-in streaming to fitness apps without add-ons, and no touchscreen or guided classes
See all picks in Best Rowing Machines for Home Cardio (2026)
Related guides

Buying guide
Best Rowing Machines for Home Cardio (2026)
Our research-backed picks for the best rowing machines: top air, magnetic, water, and connected rowers for full-body, low-impact cardio at home.
Read guide
Field guide
Rowing machine resistance types: air vs magnetic vs water
All 4 resistance types compared: air scales with effort, magnetic is quietest, water feels most natural, hydraulic saves space. Which one fits your training.
Read guide
Field guide
How to choose a rowing machine
Resistance type, noise, footprint, monitor quality, and budget tiers decoded so you can pick the right rowing machine for your space and goals.
Read guide
Buying guide
Best ab rollers for core strength (2026)
The four best ab wheel rollers for home core training, chosen by wheel stability, grip comfort, assist design, and build quality across verified owner reviews and expert sources.
Read guideResearched, not personally tested: picks come from specs, verified-owner reviews, and expert sources, scored into the Kit Score. As an Amazon Associate I earn from qualifying purchases. We may earn a commission from links here, at no extra cost to you. How we research →